If you’re new to the world of gold hunting, I’m glad I get to welcome you.
If you’re a fellow metal detectorist, don’t be shy. Panning for gold is essentially metal detecting without the metal detector.
You don’t need to spend your money on a machine with advanced features made to hunt a specific target.
You just need a few supplies, your wits, and good old-fashioned patience.
So whether it’s because of simple curiosity that you’re here, or a deep interest level, get ready.
Lean in, and learn how effortless it is to start panning for gold with my step-by-step tutorial made easy for you.
What is Gold Panning?

First things first, what is gold panning?
Gold panning separates gold from other minerals by an uncomplicated sifting process involving a pan and water.
The concentration of gold recovered during “panning” is found in placer deposits (alluvial), a collection of heavy minerals like gold and magnetite in flowing water systems, usually streams.
You’ve probably seen the old images of men with scraggly beards on their hands and knees, prospecting their collection of dark soil in a pan.
While these visions of gold rush pioneers remain constant at the mention of gold panning, this form of mining dates back to Ancient Rome.

But modern gold panning is still the same as it was over 2000 years ago. And because of the rarity and value of gold, panning is still a great way to cash in, no matter your experience.
What Does Gold Look Like in a Pan?
Before we get into the “how” of gold panning, let’s ensure you’re prepared and know what to expect.
While you might imagine yourself plucking a baseball-sized golden nugget from the water, think again.
It’s certainly not out of the question, but you might have just as much luck finding a gold-filled volcanic rock.
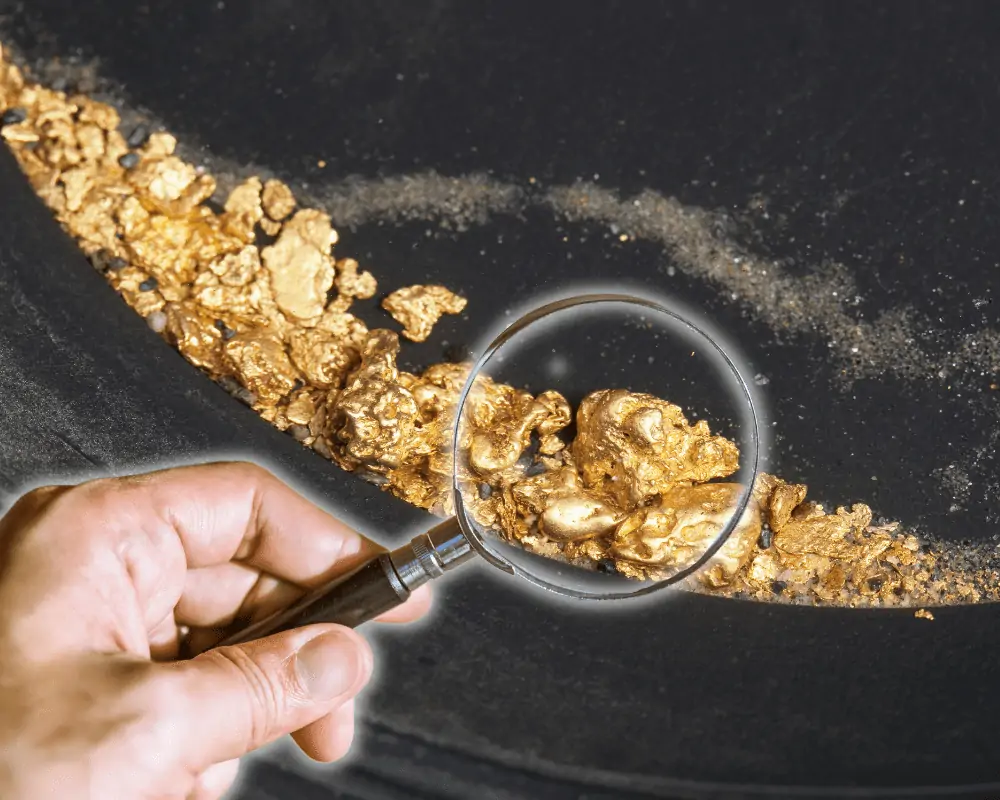
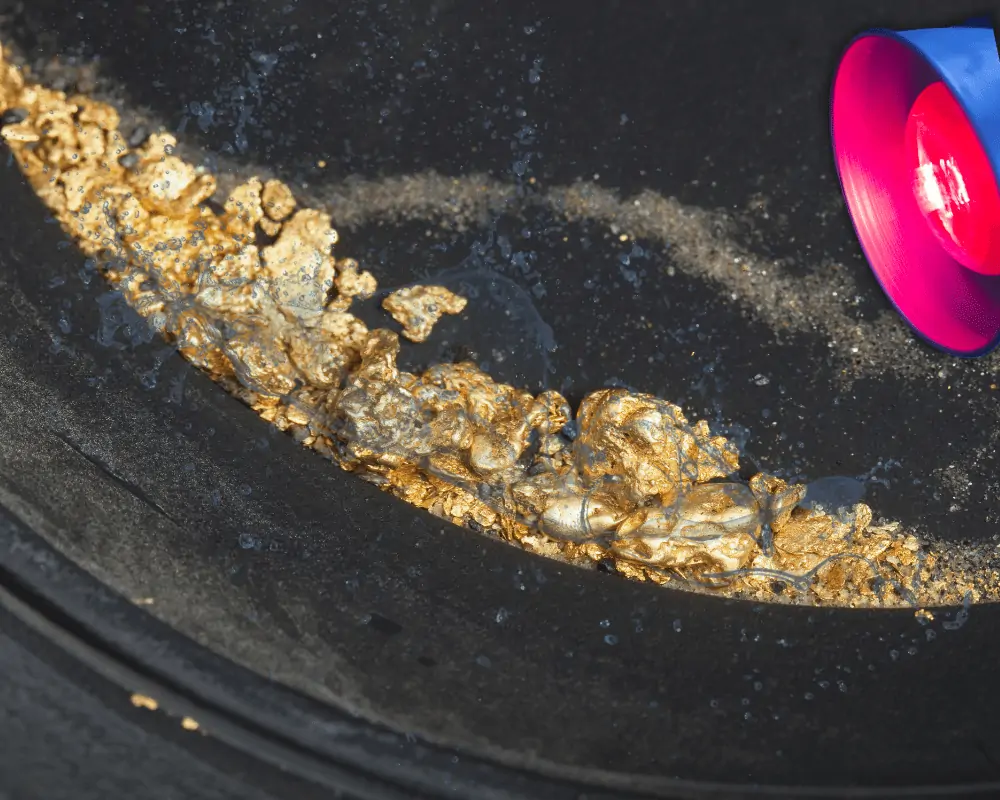
Gold found when panning in placer deposits usually ranges from small flakes to slightly larger nuggets, with a brassy yellow shine and a smooth bumpy surface.
A bit of fair warning, though.
Many minerals look like gold, specifically iron pyrite or fool’s gold. But real gold will appear bright, not glittery, in daylight or shade.
So before you get too excited, do a quick visual check out of direct sunlight to be a bit more confident.
Is Gold Panning Profitable?
It’s a tricky question, but I’ll say this.

Gold panning can be profitable because of the minimal expenses required to start and continue.
Once you have the initial equipment you need, you won’t have to worry about any ongoing costs.
So every dime you make after reimbursing yourself for the panning equipment is pure profit.
However, that’s assuming you live reasonably close to some natural gold deposits.
If not, you could be spending more on gas to find a good site than you make in gold panning.
Can You Make a Living Gold Panning?
The chances of you making a living gold panning are slim. Most of the time, panning will result in the discovery of enough gold to fill a thimble.
Unless, of course, you get lucky and stumble upon a deposit of gold never before found.

But that is easier said than done.
Now, you could search for deeper and richer gold deposits, which would require a more significant investment in high-tech tools.
If you did have the economic backing to expand your gold panning operation, there’s no guarantee of success. Although your odds certainly increase.
How Much is Panned Gold Worth?
Panned gold, like any raw gold, still holds incredible value.
Back in 2009, during an uncertain economy, gold prices were as high as $950 an ounce.
As of September 2022, the price of gold, even panned gold, is as high as $1,679 per ounce.
For a gram of gold, today’s cost is $53.98.
How Much Gold Can You Pan in One Day?

How about I give you a definitive idea of how profitable gold panning can be?
Now, it’s near impossible to give you a fixed amount of gold you can pan in one day. There are just too many factors to consider.
But let’s say you’re panning a stream known to be rich in gold deposits, and you’ve had years of experience to perfect your technique.
Depending on the size of the deposit you’re panning and your experience level, you can collect up to 4 grams of gold in one day.
With the current price of gold, 4 grams will net out to $215.92.
Keep in mind that this assumes a lot of generalities.
To see how I came out to this number, check out this video by Dan Hurd, teacher and treasure hunting YouTuber.
Gold Panning Equipment
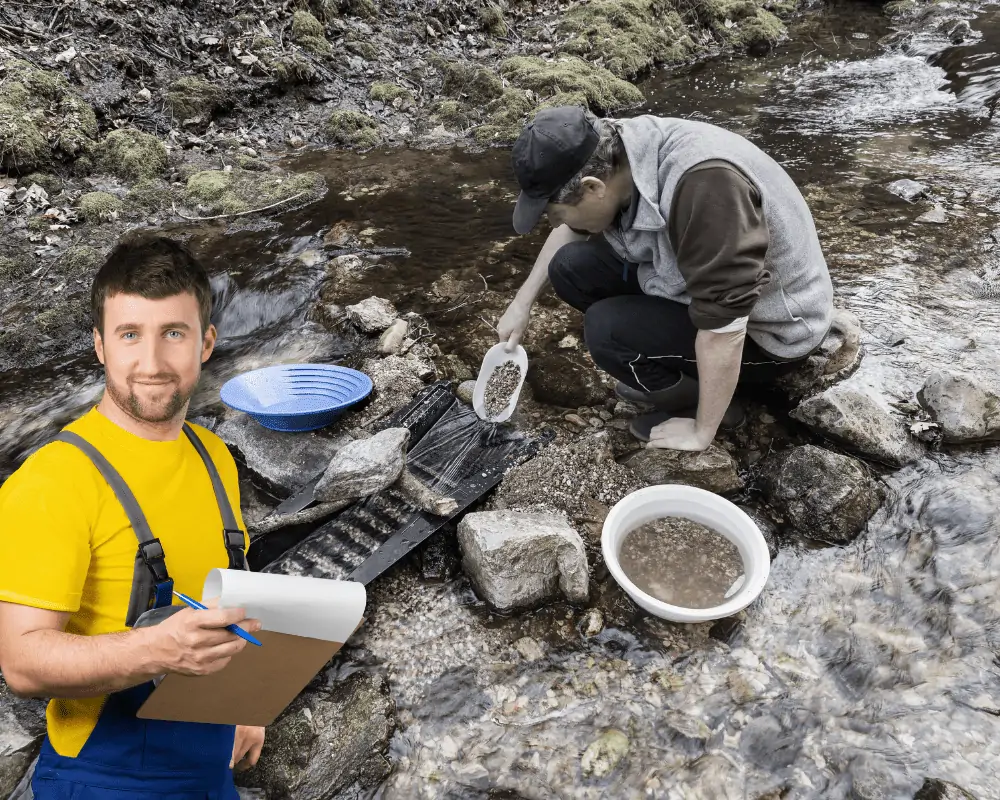
Whether you’re gold panning along the bank of a rushing river or in the comforts of your own home, there isn’t much you need in terms of gold panning equipment.
You’ll find that a lot of panning pros use various kinds of tools that you think you need. However, most of that stuff is optional.
I wouldn’t invest too much until the panning bug has bitten you.
Some of the equipment I’ll mention won’t be necessary if you’re panning at home, like waterproof boots. But I think you can figure that out on your own.
Anyway, here’s a list of the gold panning equipment I’d recommend for beginners.
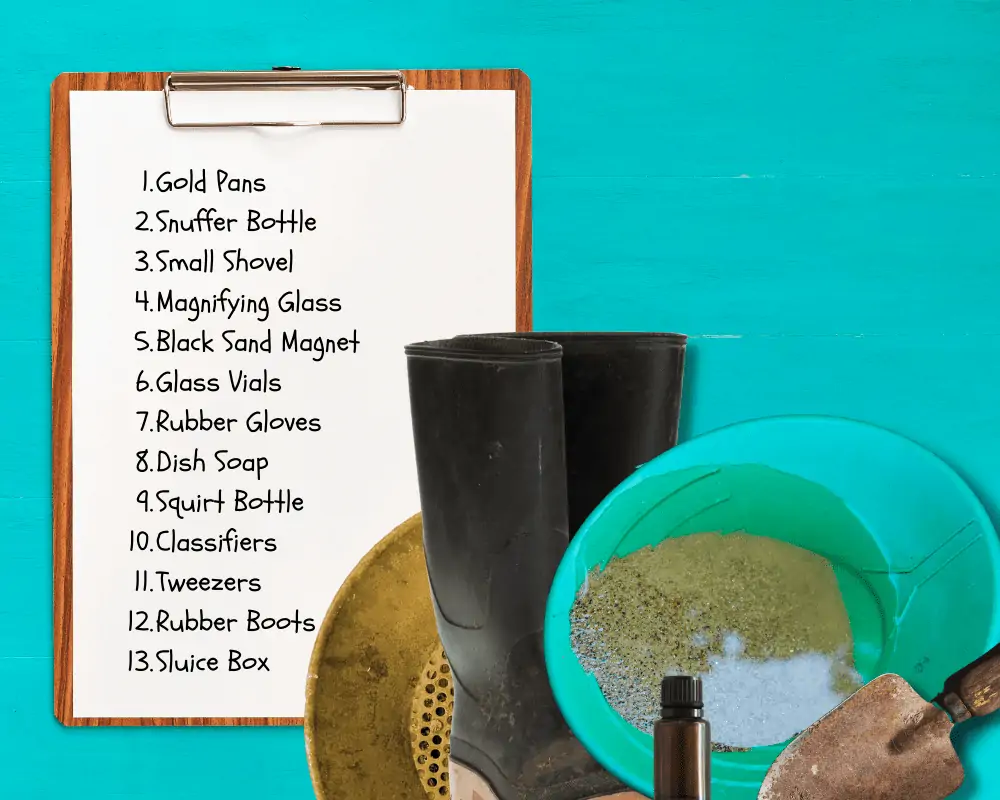
What Equipment Do You Need for Panning?
As I said, some of the equipment I mentioned is optional. And others will kick your game up to another level when you’re ready.
With that said, let’s review some of the equipment you need for panning.
Gold Pan
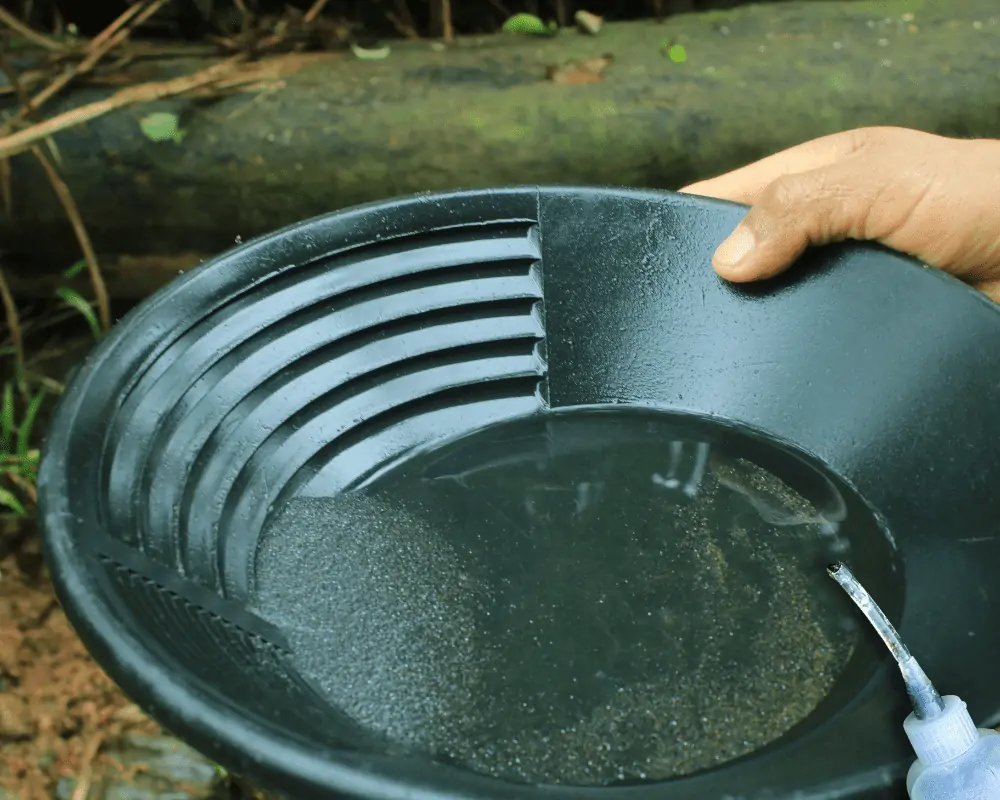
A gold pan will come in different sizes, but they should all have a set of riffles in the plastic to sift out undesirable minerals.
A pan for gold panning is not optional, as I’m sure you guessed.
I’d recommend at least a 14-inch gold pan. Anything smaller will take you longer to sort out the gold.
A tip for gold panning beginners…you’ll want to season your new pan.
Seasoning a pan removes any oils from the manufacturing process. The oils could let the gold sift out with the waste sediment if left unseasoned.
You can look up endless videos on seasoning your pan or follow these easy directions.
Throw some sand from the stream into your pan with a drop of dish soap and water.
Scrub the surface until you feel you’ve removed the glossiness from the pan.
If it’s still glossy, do it again. That’s it.
Snuffer Bottle
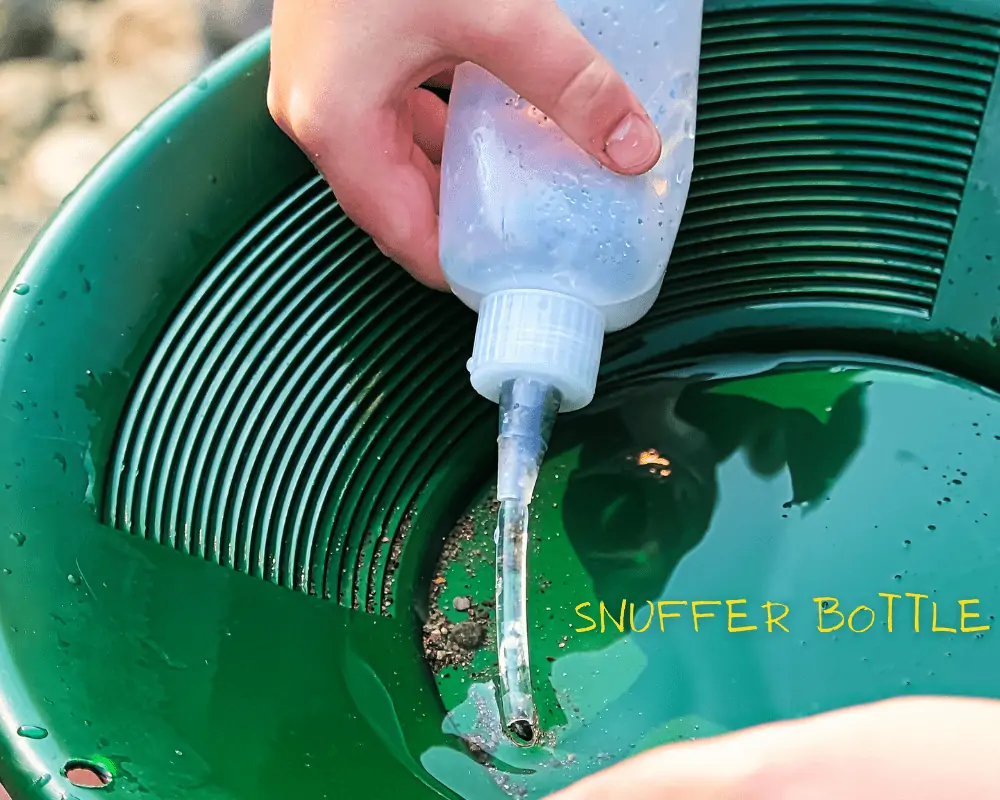
A snuffer bottle is the best way to suck up those bits of gold you find at the bottom of your pan.
You could use tweezers, but this is simpler. And you don’t have to worry about shaky hands dropping your gold.
Classifiers
A classifier is a fancy word for a strainer. It usually looks like any other gold pan or sometimes a bucket.
The difference is that these pans have a mesh screen at the bottom that lets your tiny minerals sift through while catching the larger rocks to discard.
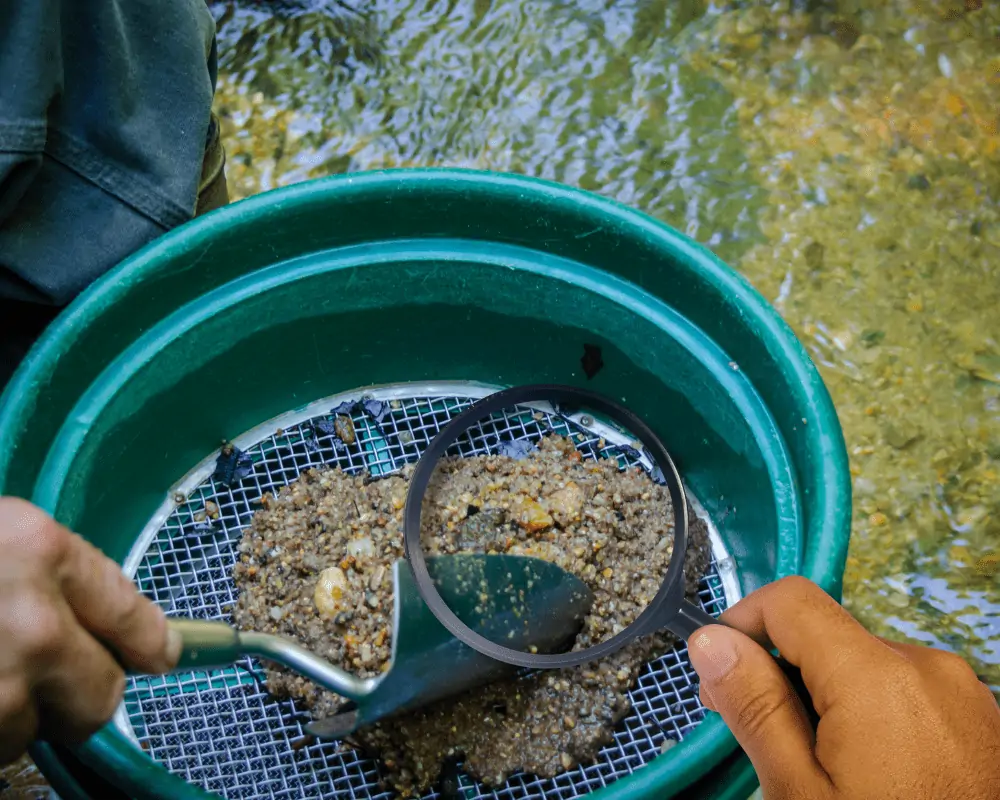
Classifiers speed up the panning process, especially since they offer various-sized holes in their screens or sieves.
This permits you to execute several straining processes and to go back to examine the less-fine minerals later.
Small Magnet
A small magnet might not be an essential tool for gold panning, but you’d have to manually sort out the trash minerals without one.
During the panning process, you will come up against a lot of black sand. Black sand is a magnetic mineral and loves to hang out with the same gold you’re looking for.
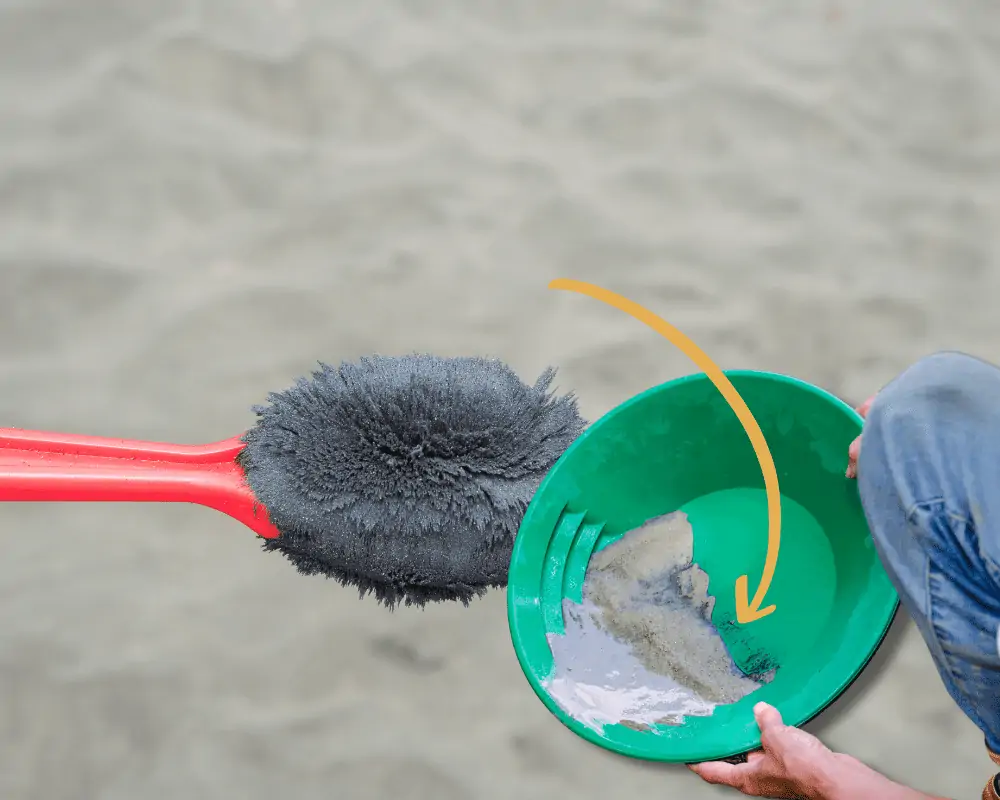
Using a magnet lets you easily pull out the unwanted sediment, allowing the bottling of gold to be faster or more efficient.
If you do decide to use a black sand magnet, just make sure you dry out your collected sand first.
Otherwise, some of the gold may get stuck with the black sand pulled to the magnet when wet.
Glass Vial
You need something to keep your gold in, right?
Small glass vials are the usual method of storing your panned gold.
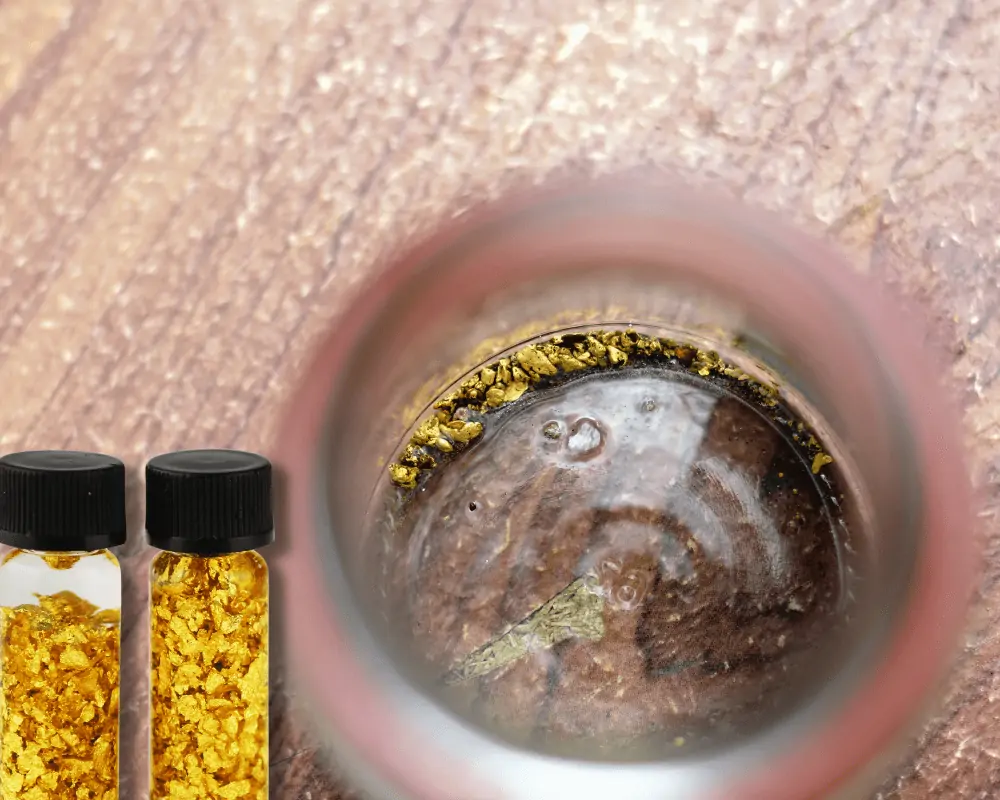
They’re watertight, reasonably durable, and easily transportable.
There’s no sense in lugging around an empty coffee can to keep your gold. You’re not filling that anytime soon.
Sluice Box
A sluice box is a sloping trough with strategically placed riffles meant to be placed in a stream to slow down the funneled current, allowing gold to settle at the bottom.
It’s not necessary for gold panning beginners, but I did want to mention it.
Getting a sluice box is the next purchase you need to make if you fall in love with gold panning.
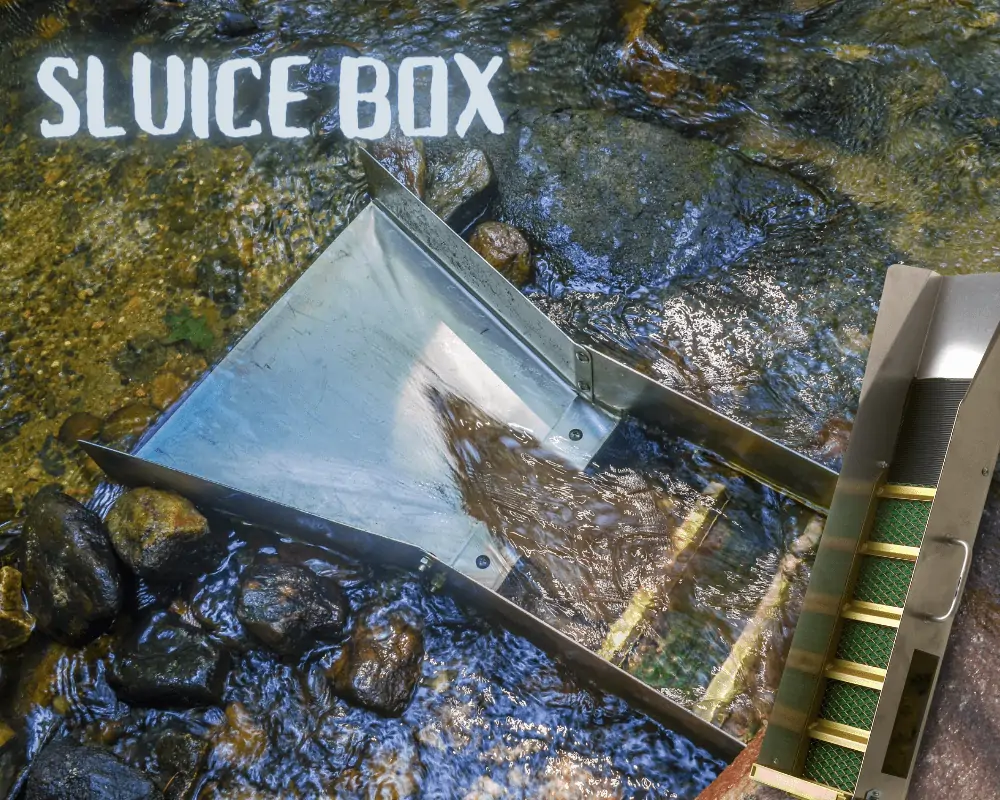
They’re generally made of aluminum and come in many different sizes, from lengthy foldable contraptions to mini portable boxes.
Best Gold Panning Kit for Beginners
Look no further if you need gold panning equipment and want all the essentials without the high cost.
You’ll love this 11-piece gold panning kit for beginners! You get everything you need and then some.
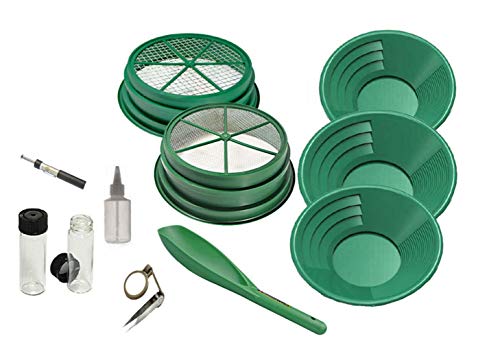
- 3 gold pans of different sizes gives you options to go along with the type of panning experience you dream of.
- 2 different classifiers for sifting out larger rocks and minerals. One has a 1/2 inch screen and the other has a 1/8 inch screen.
- Includes all the essentials to get you started, like a snuffer bottle, 2 glass vials, and a magnetic separator.
How to Pan for Gold for Beginners
You made it!
You now have the foundational knowledge that every gold panning beginner should know.
You can tell me what gold panning is, whether it’s profitable, and to what extent, and you know what equipment you need for gold panning.
No more theory. It’s time to teach you how to pan for gold.

Everyone has their own tips and tricks on gold panning, but the basics never change.
For any beginner to succeed in panning for gold, you must follow the 5 steps of a strong panning technique.
Step 1 – Prepare Your Gold Pan
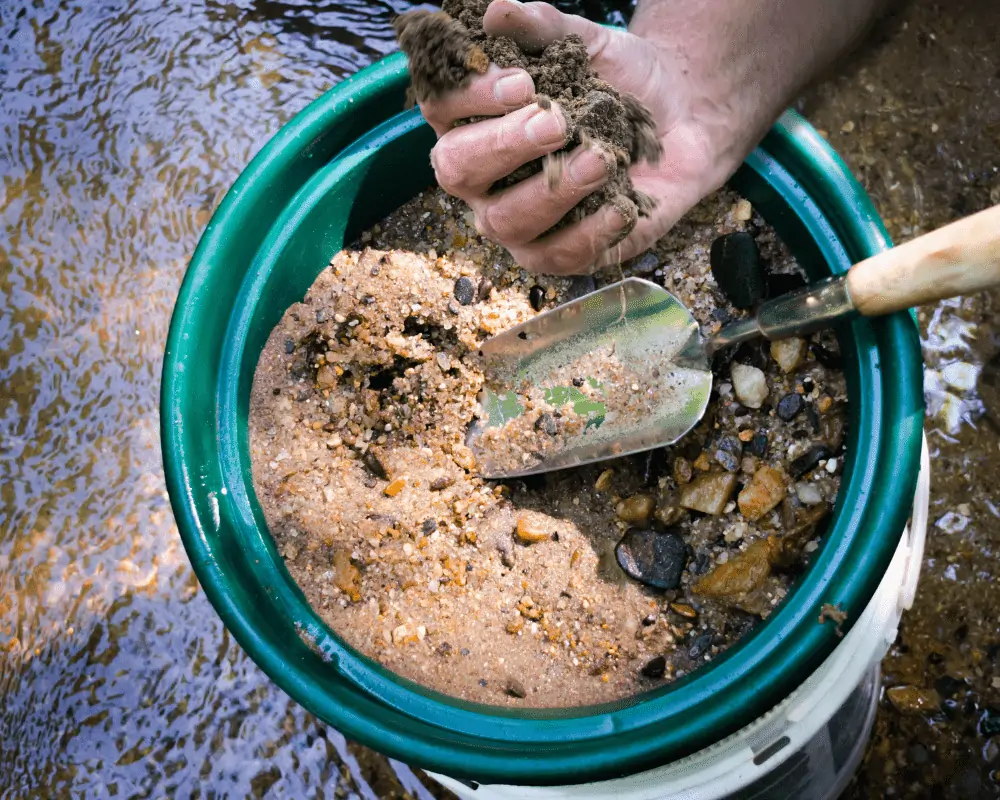
You have your gold pan filled with rocks and other minerals. You’re staring at them as you idle by the river’s calm waters.
Or a plastic tub of water if doing this at home.
So how do you find gold in your pan, if there is any?
Well, there are two approaches you could take. Neither of which is wrong. Let’s call them 1A and 1B. But we’ll look at step 1A first.
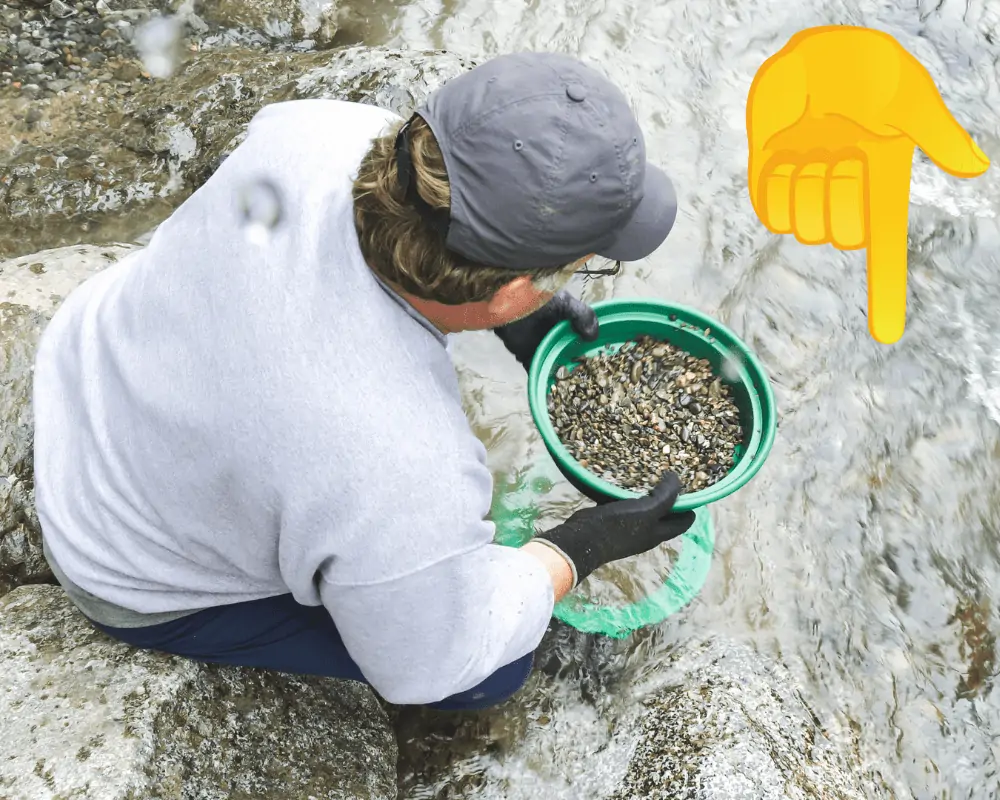
This first step in gold panning is to submerge your pan and contents in water, filling the pan before pulling it out.
With your hands, either gloved or not, mix the minerals, pulling the bottom contents to the top.
Do this several times, only stopping momentarily to break up chunks of clay or packed soil.
This step should only take 10 seconds or so, at most.
You just want to ensure everything is wet and well-mixed.
Once satisfied, remove the larger rocks on the top surface of the pan.
The alternative to this, step 1B, is to use a sifting pan.
How Do You Use a Sifting Pan for Gold?
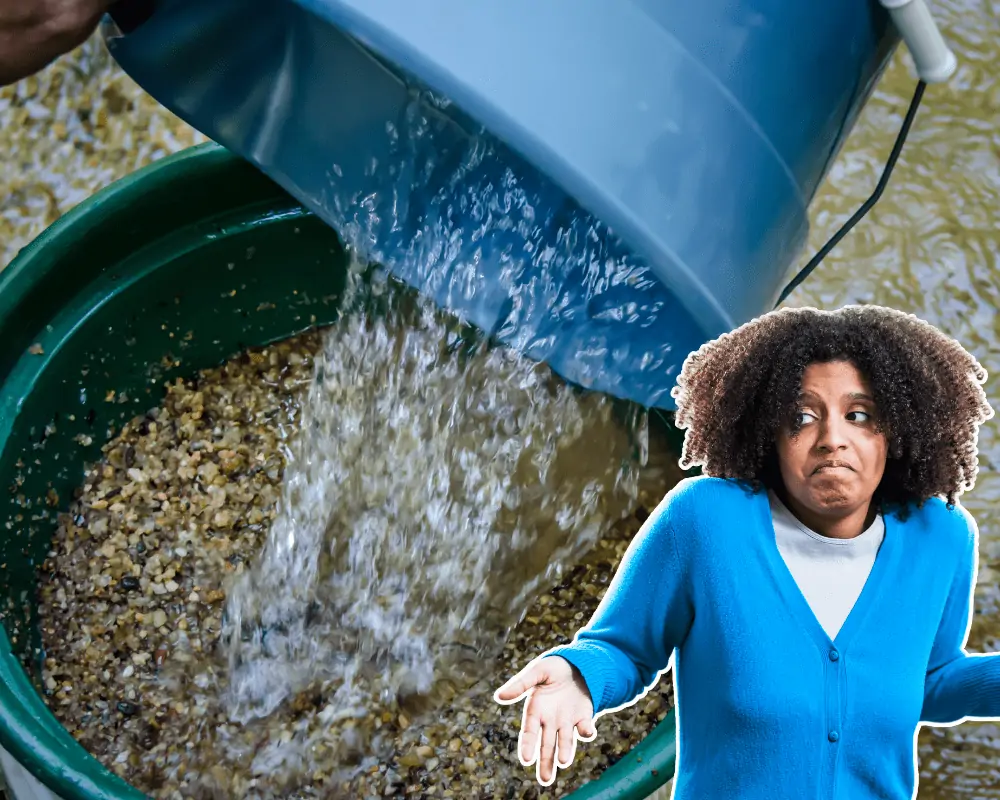
This method takes your collected minerals in your gold pan and pours them over a classifier or sifting pan.
This separates the large rocks from the more minor minerals. So ensure you have a bucket or additional gold pan underneath the classifier to catch what falls through.
After the initial fallout of minerals escapes through the screen, give your sifting pan a couple of little shakes to loosen any lingering flakes.
After that, take an extra minute to examine the classifier for any valuable minerals left behind.
If any captured contents appear to be dirt or clay, break them up and shake them loose in the sifting pan one last time.
The benefit of this technique is that you can save time by incorporating the sifting pan and a black sand magnet.
Once you’ve sifted all the finer materials into the gold pan, you can take your magnet and run it through the sediment.
Gold is not magnetic, but any other magnetic minerals, like black sand, will be drawn out of the pan.
I would do this two or three times to guarantee you got the most out of it.
As I said earlier, the magnet should only be used with dry dirt. So keep that in mind when panning for gold.
Step 2 – Stratify Your Minerals
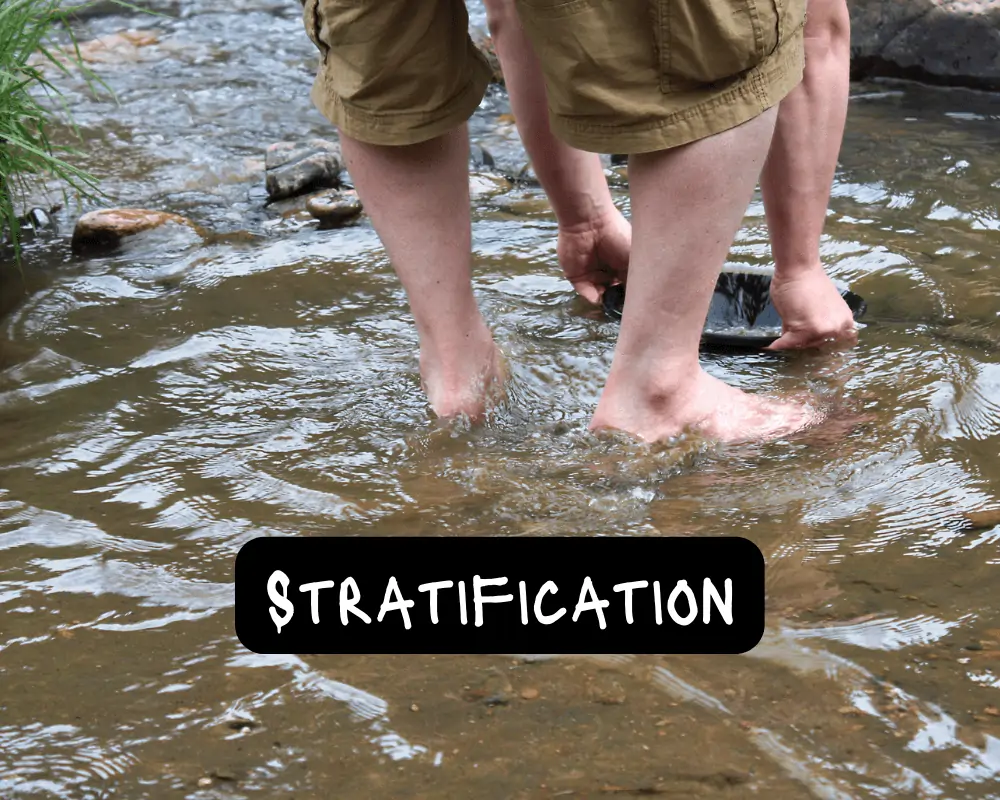
In gold panning, stratification is the process of layering the sediment by agitating the water around it.
You want to stratify the contents of the pan to separate the gold from the rest of the minerals.
Since gold is one of the heavier materials, the agitated water allows it to fall to the bottom of the pan.
So how do you stratify the contents of your gold pan?
It’s simple.
Take the pan with both hands, one on each side, and shake it up.
You don’t want rocks flying everywhere, but you want enough motion to suspend the gravel in the water.
You can use a circular motion or a left-to-right movement; it doesn’t matter. As long as the rocks and pebbles get a sufficient suspension for 10 seconds or so, it’s a success.
Now, slightly submerge the pan and let the dirty water run out as freshwater flows in.
Finally, remove any large rocks on the surface and toss them to the side.
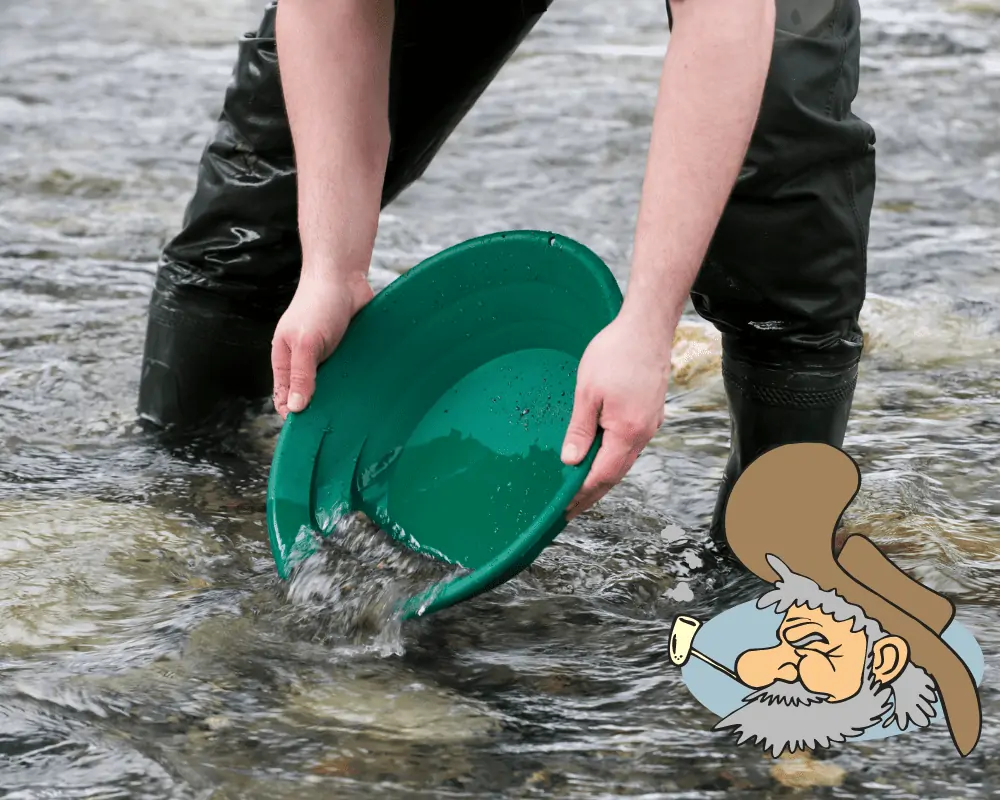
Step 3 – Wash The Remaining Sediment
Washing what’s left in your gold pan is similar to the stratification of step 2.
You want to use slow movements during this step to allow water to clean or carry out the undesirable sediment.
To do this, use the following 2 techniques.
- Narrowly dip the pan in water at around a 35 to 40-degree angle. You want the crease, where the base of the pan and the side wall with riffles meet, to point straight down like an arrow.
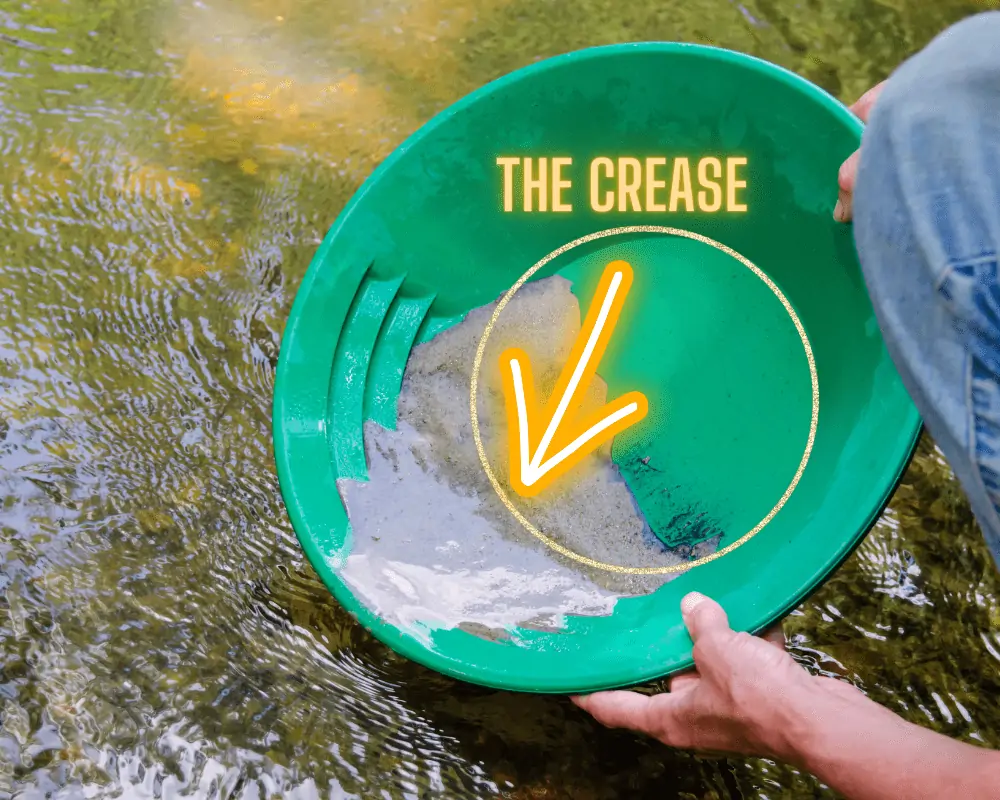
- Using a steady pace and letting the water do the work, dip the angled edge of the pan into the water and pull it back toward you as you lift it out. This creates a comfortable flow of water to wash out the top layer of the deposit.
Continue this dipping process 3 or 4 times, being careful not to thrust the pan forward when dipping.
That will send your gold back down the river.
Step 4 – Rinse and Repeat
After the third or fourth dip into the water, repeat steps 3 and 4.

Stratify and wash.
Stratify and wash.
Over and over, until you notice black sand gathering toward the back end of the gravel in your pan. The lighter minerals, or what’s left of them, will flow out.
When the majority of your gravel is gone and only dark sand and gold remain, this is your sign to stop washing.
Step 5 – Removing the Gold
To remove the gold, you want to let a little water back into the pan and stratify once more. But this time, simply swirl the water around the pan.
Shaking it could cause an unfortunate accident.
Swirl the water 2 or 3 rotations and then take one of your hands and tap the side of the pan several times.
This tapping will cause the black sand and gold to separate.
Because of the gold’s weight, it should start to amass at the crease in the base of the pan.
When you notice the bulk of the gold has been separated, take your snuffer bottle and suck it up.
Once you’ve got all you can see, re-stratify and tap again.
Do this until you’re confident you’ve panned all the gold from your deposit.
And before you transfer the gold into vials, dry them out first so you can get their proper weight on the scale.
I understand that is a lot to take in. I promise it’s not hard, but it requires some practice.
You’re bound to dip too hard sometimes or get frustrated when you don’t see any black sand immediately.
But a trick you can use to test your technique is to drop some small lead BBs in your gravel at the start of the panning process.
At the end of step 5, you should find your BBs if you’ve panned correctly.
If not, it just means you need more practice.
I’ve left a video below for you. While you can probably find many helpful tips online, this beginner’s instruction takes the mystery out of the gold panning process.
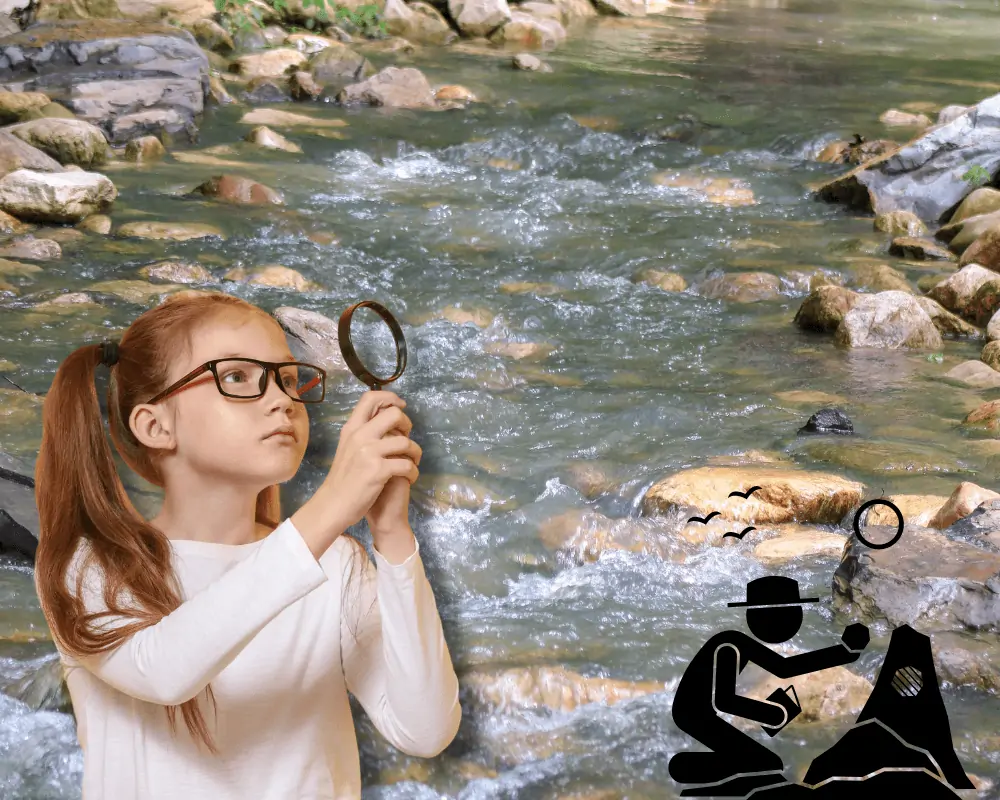
What to Look for When Panning for Gold
Before you head down to the closest stream, creek, or river, and begin panning as soon as you hit the water’s edge, stop and consider your options.
I said panning was easy, but you gotta know where to pan first, right?
Some signs can be identified easier than others as an excellent spot to start panning for gold.
The US Department of Agriculture’s Forest Service suggests that the best place to find gold exists where turbulent water changes to a slower-moving flow.
While that’s correct, it’s a little more nuanced than that.
To have success finding a place to pan for gold, you must have a general sense of the geography.
Where is the river water sourced from? At what location is the flow most volatile?
These are all great questions to ask when narrowing down your search.
However, there are many more things to look for.
What to Look for When Panning for Gold in a Creek?
Let’s talk about panning for gold in a creek, for instance. How do you know where you should start?
Perhaps you’ve walked up to the part of a creek where the water simply trickles by. Just because these aren’t raging rapids doesn’t mean you’ll find gold.
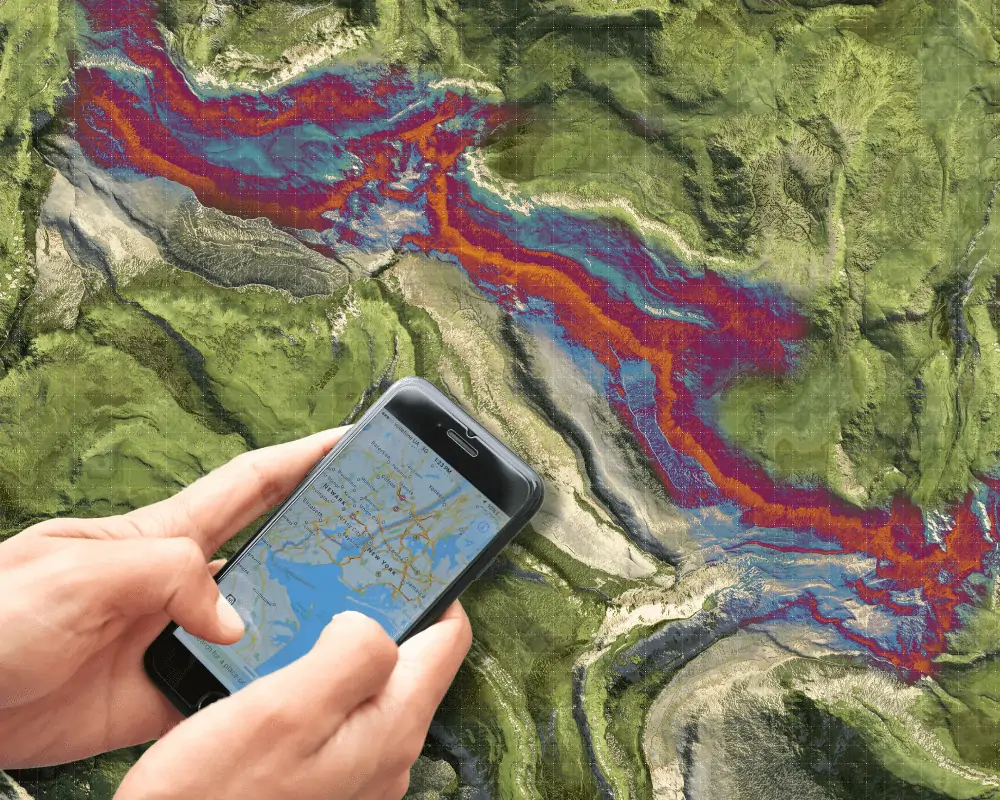
The first thing you need to do is to map the creek.
Mapping a creek is learning the twists and turns, the convergence points from other waterways, and how the land elevation impacts water flow.

Luckily, this is as easy as checking Google Maps on your cell phone as it displays your area’s known waterways and topographical information.
Other fantastic resources are available to trace a waterway’s path, like the real-time interactive map in the USGS Streamer app.
Once you’ve mapped the creek, you’ll be able to find the lowest points of elevation, the bends of the path, and the drop in water momentum.
These locations would be the places to look for panned gold in a creek with the highest chance of success.
Some other signs to look out for are:
- The areas of slower-moving water directly after waterfalls and rapids.
- A collection of boulders or rocks that act as a natural trap for flowing gold.
- Shallow parts of the creek where the water flow isn’t strong enough to carry the weight of the gold further.
- Turns or bends in the creek where gravel collects along the bank.
- Streaks of black sand in a riverbed when there is no presence of rocks and pebbles.
Can You Pan for Gold in Any Stream?
No, you can’t pan for gold in any stream. For gold to end up in a stream, it must have flowed down from the originating gold deposit.
Unfortunately, these deposits don’t exist everywhere.
You can pan for gold in many streams, even if there has been no reported gold discovery in the past. But you should get familiar with the area’s geologic properties before wasting your time.
Is Panning for Gold Worth It?

I hate giving uncertain answers, but it depends.
You’re probably wasting your time if you want to claim your fortune and make history.
Don’t expect fame and glory unless you’re fortunate enough to find an untapped gold deposit.
However, if you’re ok with a steady stream of money (no pun intended) and spending your time outdoors, gold panning is worth the experience.
It’s an adventure that every treasure hunter should try at least once.
If you decide it’s not for you, pick up a gold detector and hit those gold fields in search of some real nuggets.
Where Can I Go Gold Panning Near Me?

Check out my article on places to go panning for gold in Texas if you need a new hot spot. The same methods I use in Texas can be applied anywhere in the US.
Otherwise, you can find a good place for gold panning by visiting the Gold Prospectors Association of America website and searching their claim database.
Just type in your location, and you’ll get a list of properties to go prospecting for gold!
But, to get details on these properties, you must be a member of the GPAA.
FAQs About Gold Panning
I imagine you have some questions. Gold Panning is easy, but there’s plenty more to know about prospecting before you can call yourself a pro.
How Do I Sell My Panned Gold?

Selling your gold isn’t difficult.
There are only two steps in selling your panned gold.
The first is to have your gold tested or assayed. The purpose is to see how pure your panned gold is.
You can do this through an online service or seek out a local merchant.
The second step is to find a local dealer to buy your gold. Usually, the merchant who assayed your gold will offer to buy it from you.
Besides local retailers, you can try and sell your panned gold at trade shows, auctions, prospecting clubs, and even eBay.

I’d recommend knowing the current market price for gold, but don’t expect to get that.
Also, it’s good practice to get multiple quotes before deciding on a dealer.
So be patient and find someone you can work with long term.
Do You Need a Permit to Pan for Gold?
Again, it depends.
Some rivers and streams run through protected or private land, which designates their own rules.
For example, a gold panning permit is required at no cost if you want to pan for gold in some state and national forests.
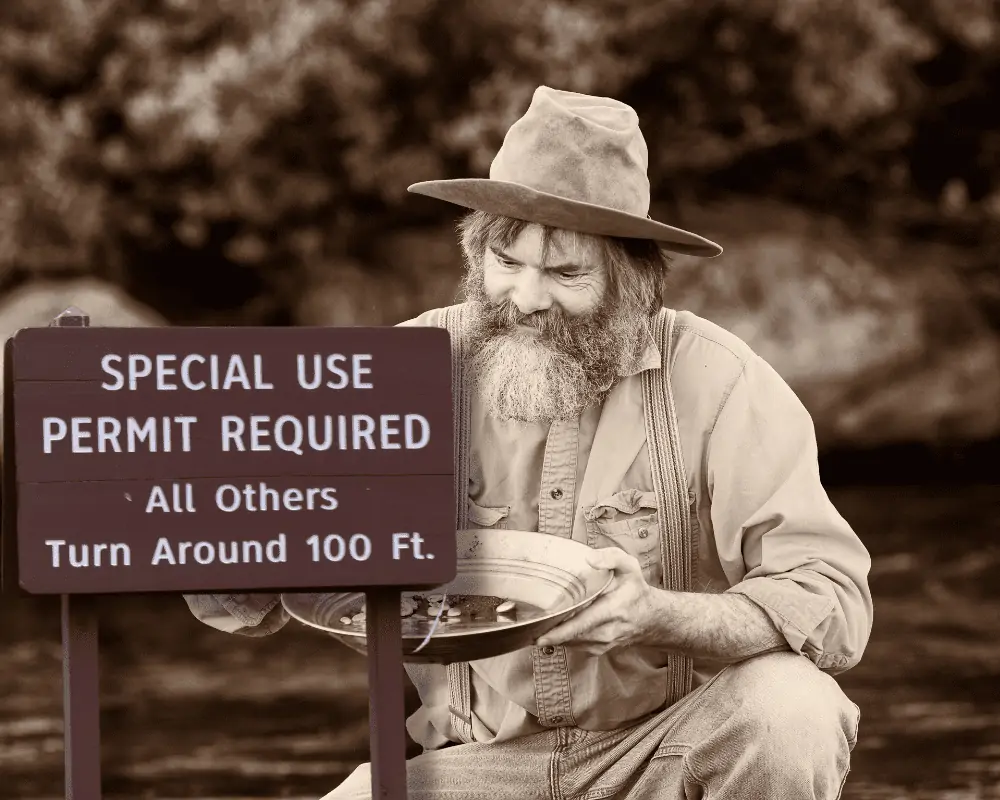
Alternatively, public locations, such as recreational land in Indiana, allow you to pan for gold in specified bodies of water with a valid license and permission when necessary.
In short, a permit is not always required to pan for gold, but you should always check with local, state, and federal policies before attempting.
To Sum Up
Panning for gold has advantages, and the few times I’ve ventured out have been well worth it.
It’s relaxing, easy, and often ends with a bit of gold in your pocket.
While I’m a metal detectorist to my core, I keep a gold pan close by on every trip.
Now, I’ve given you the foundation. You have the know-how, and once you get the proper gold panning equipment, you can start panning unassisted.
Don’t feel overwhelmed. It’s an easy process with just a bit of practice required.
Until next time!